Growth Marketing
29/5/2026
Everything you need to know on code-less automation with Zapier.


There are two ways of automating things: coding or using automation services such as Zapier. I love Zapier quite a bit (as you may have noticed), because it’s super easy to use yet super powerful. The only thing it doesn’t let you do is to store data in a database. Or does it?
Zapier is an online service that lets you automate tasks between two or more webservices. Essentially, it works like this: if X happens in App 1, then do Y in App 2, Z in App 3, etc. Leave that Xanax on the table and just have a look at this picture:

What happens here is a three-step Zap:
It’s super-simple of course and you can add plenty of other steps and even filters to execute part of the automation only if specific conditions are met.
There are plenty of resources on the Zapier website, right here: https://zapier.com/blog/
That’s great but sometimes you’ll need to store data one way or another. In a conventional application, this is something you’d do in a database which, essentially looks like that:
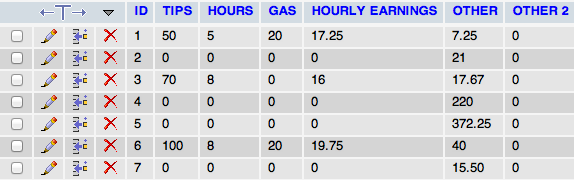
Unfortunately, Zapier doesn’t let you do this stricto sensu. Nevertheless, a keen eye can see that it looks very much alike a spreadsheet. Which is a great new given Zapier has the ability to read and write into Google spreadsheets.
Before we proceed any further, let me state that this is not a heavy duty-friendly solution and you probably shouldn’t use it a stressful production environment. Yet sometimes, you don’t have much of a choice, so here goes a quick example.
Let’s say I want to build up on the referral system I previously described, in this article (in 🇫🇷 ), and that I want to give a customized coupon code to every new subscriber of my Mailchimp list.
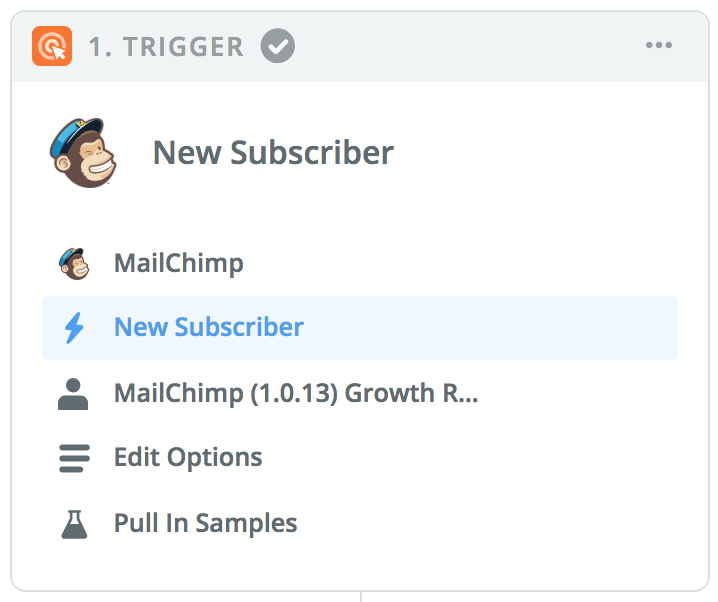
As a trigger, we’ll choose Mailchimp and as an option: when a new subscriber joins list. Pick your list, and you’re good to go!
Note: I will assume for this example’s sake that you have three fields in your Mailchimp list: referrer (which is the code of the user’s referrer), code (which is the user’s own referral code) and nbref (which is the number of referrees the user has).
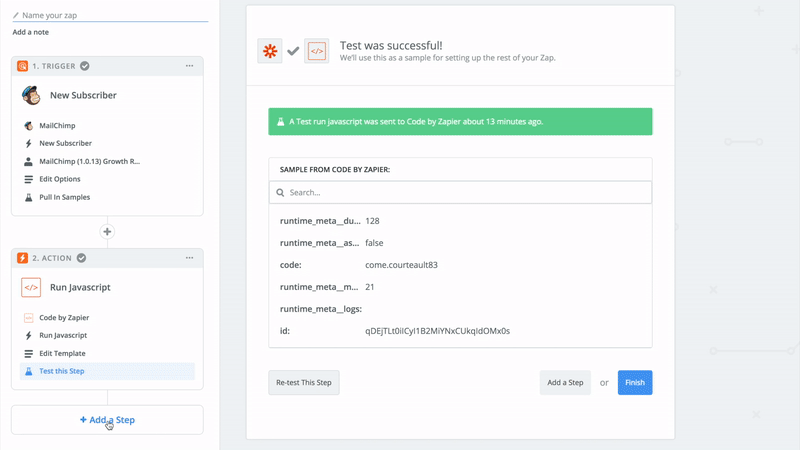
Here comes the complicated stuff. We will create a code element in Zapier (choose Run Javascript as action — although you can adapt to your favorite type of language). When you come to editing the template, name your variable as follow:

And below, enter the code. For the sake of clarity, I have commented the code, so it’s easy to read:
let name = inputData.email.split('@')[0]; //split('@') split the email address (as returned by inputData.email) in two parts: before and after the @. In the case we're only interested in the part before the @.name += Math.ceil(99*Math.random()); //Math.random returns a random value comprised between 0 and 1. We multiply it by 99 and ceil it with Math.ceil. We sum it to our name variable with += so we have a name followed by two random numbers.output = {code: name}; //we return this newly created code, so we can use it at later stages of our zap.

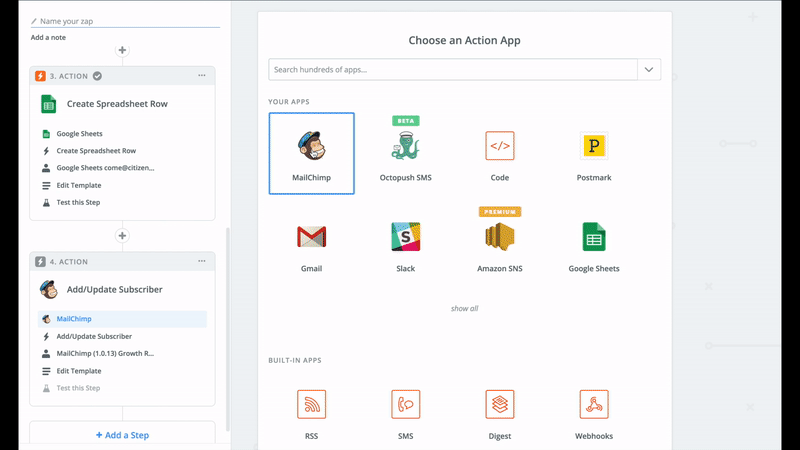
Now that we have a code, let’s create a row in our spreadsheet to match email and code. To do so, just select the Google Sheets app, and the add row action. Before doing so, your spreadsheet should already have three columns, that we’ll call email, code and nbref (I know, creative).
It’s time to update our Mailchimp list already! Now that we have the user’s referral code and that it’s been entered in our spreadsheet, we’ll update our Mailchimp list with the new user info. To do so, select Mailchimp as app and Add/Update Subscriber as action.
Then, you just have to select your user’s email and to fill the field code and nbref to 0.
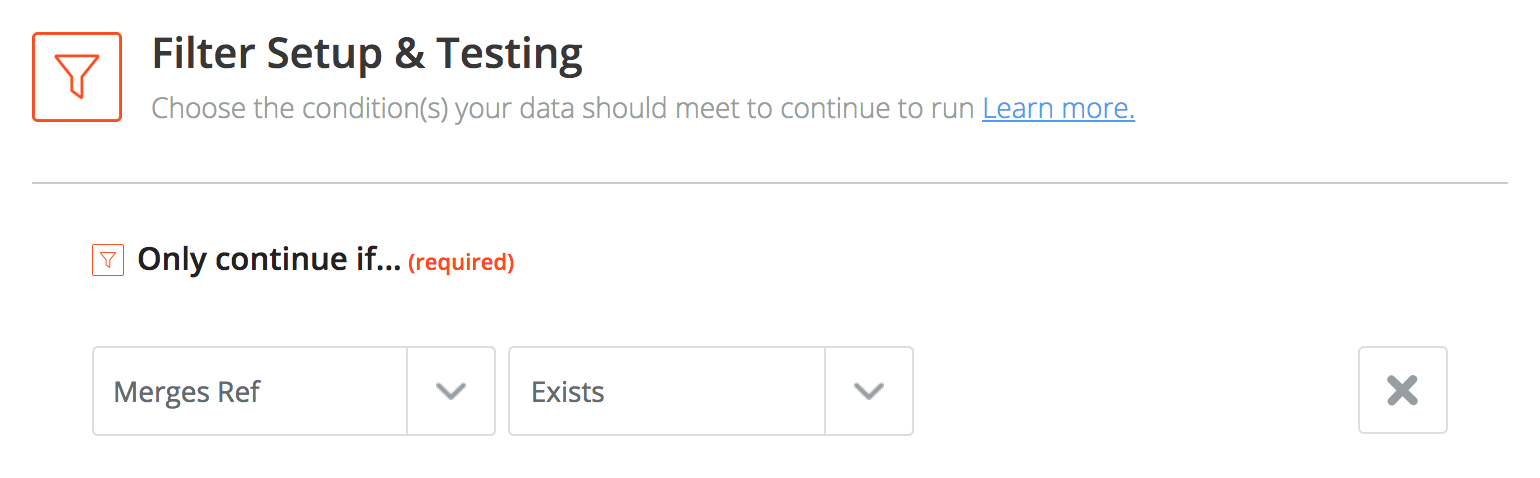
We’re not done yet! We need to check whether our user comes from someone’s referral. Hence, we’ll first add a filter to check whether our user has a referrer field that is not empty. To do so, add a step, choose app filter and only continue if the referrer field is not empty:
In the case the referrer field isn’t empty, we should first find which email matches the code. To do this, we’ll have to fetch information from our Google Sheet database. Hence, let’s create another Google sheet step with Lookup in Sheet as action. Here, we will do ask for the row number, the email and the nbref of this user.
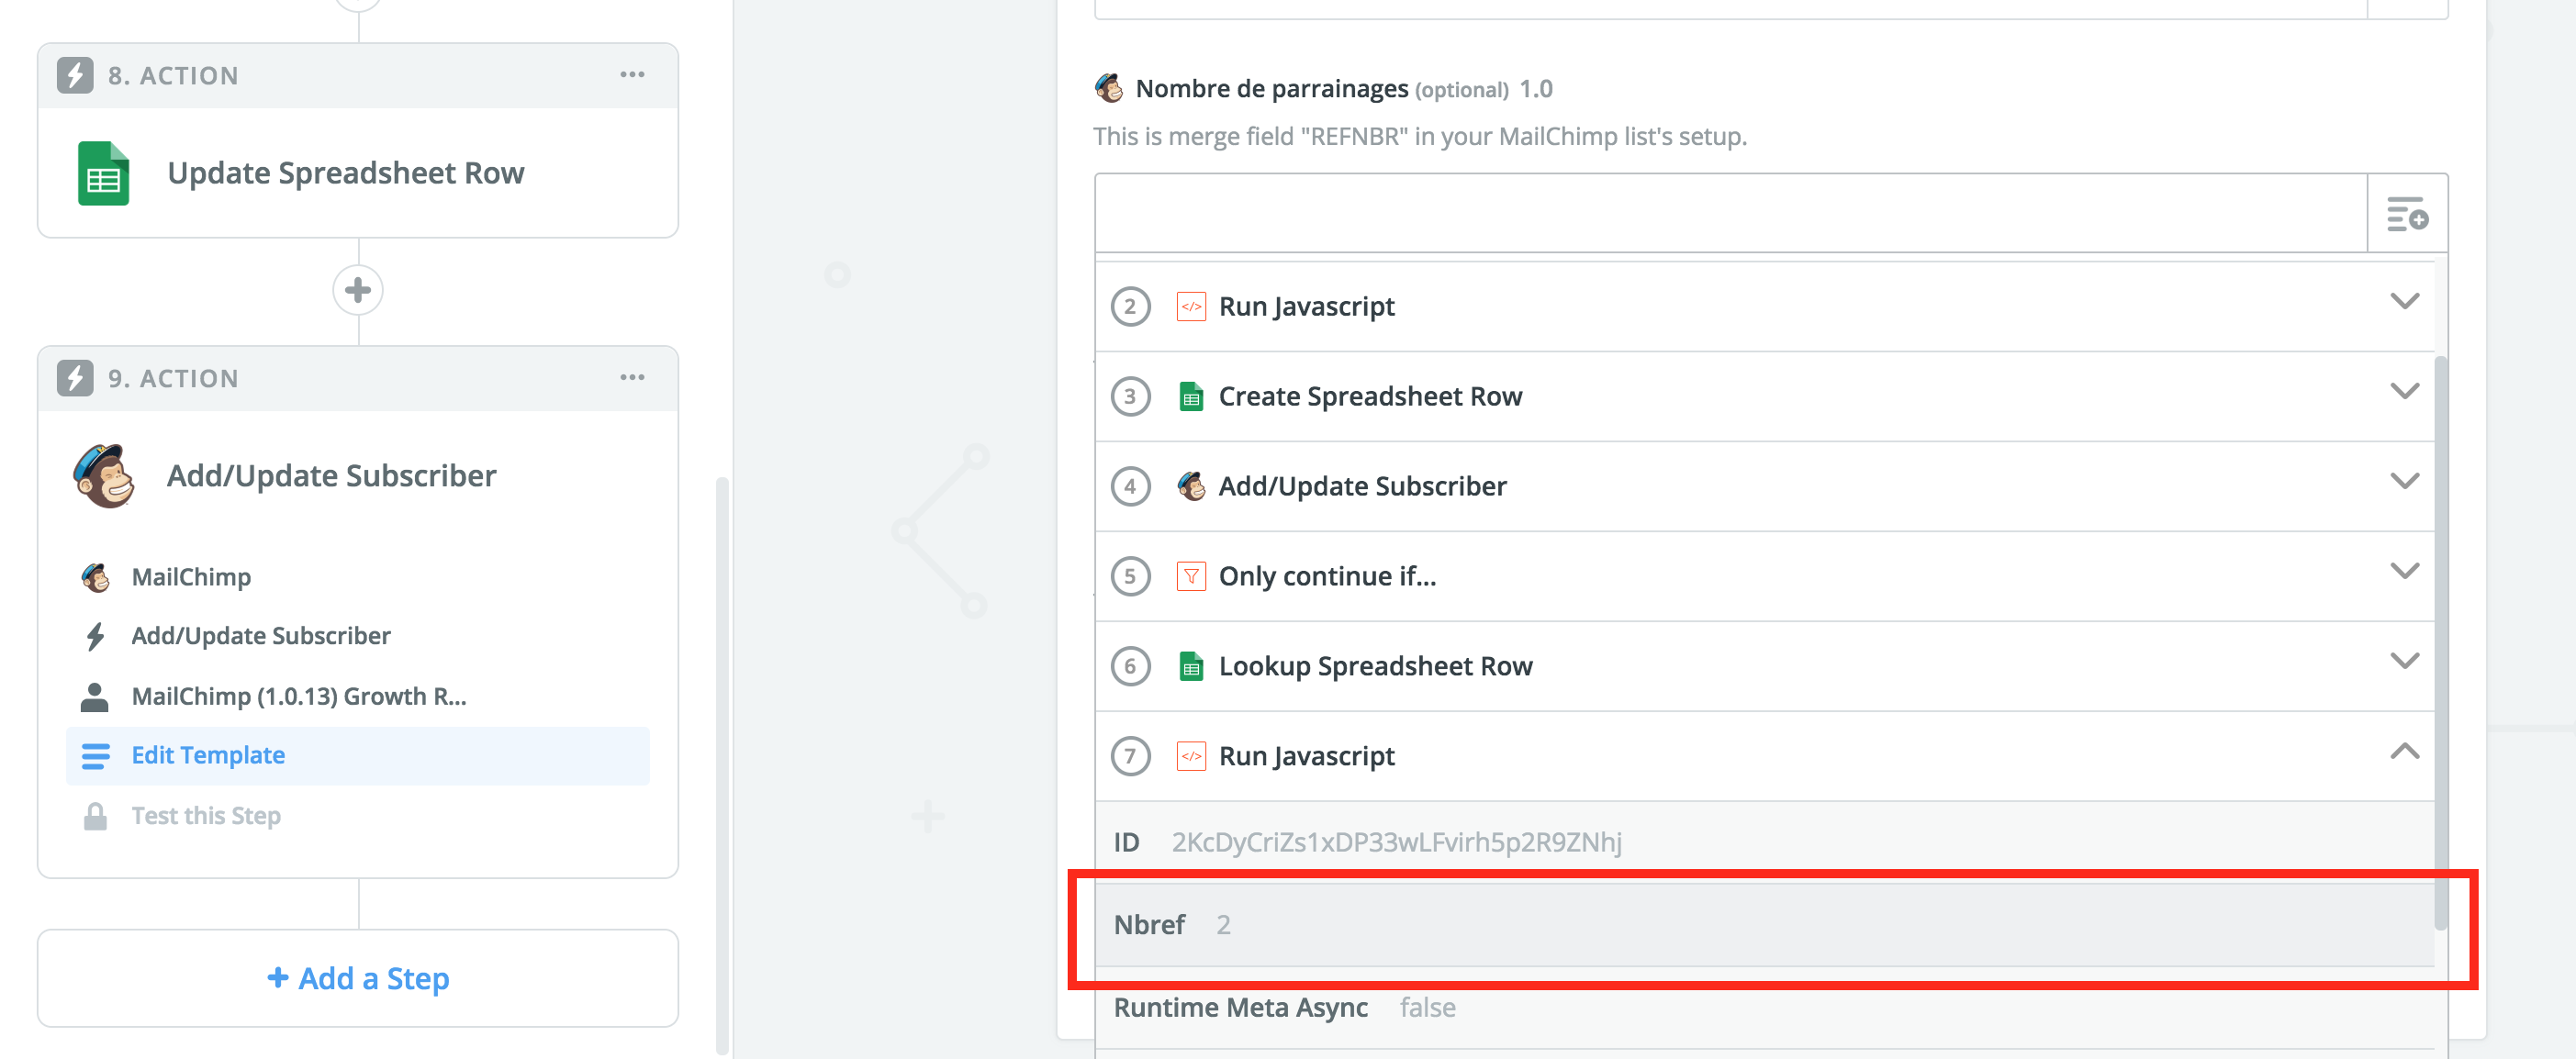
Another code block. Yes, that’s a lot of steps for such a simple thing but we need to create a very simple code block just to increment our nbref value.
Just like Step 2, except the parameters and code look like this:

let result = parseInt(inputData.nbref); //we change the nbref type to a number
result++; //++ increment by one
output = {nbref: result}; //we return the result
Now that we have our new nbref value, we have to update our Google Sheet database. To do so, just add yet another Google Sheet step and choose Update Row as action. Choose the row you’ve returned in Step 6 (use enter custom row value) and update the nbref column with the new value.

Last step! Now that you have your new nbref for your referrer, you just have to update Mailchimp accordingly. In order to do so, create a ninth step, select Mailchimp as app and Add/Update Subscriber as action. Just fetch the user by his email and update the nbref value.
Tadaaa! You’re done! 🎉
This is a quick example of what you can do with almost no code (and when there is code, these are bits you can easily find through a Google search). Of course this is not perfect. First, it relies on Zapier and a Google Sheets search. By essence, this can cause some problems. Second, Zapier can have downtimes or glitches sometimes (though their autoreplay function is pretty neat). Third, it’s very possible that these are the farther you can go with something like Zapier.
Should you need more power, I would strongly suggest to use some custom-built script (hint: you can use Google script as a way to execute Node.js-like scripts online for free). Yet this a pretty useful solution if you have little to no knowledge of how to code.